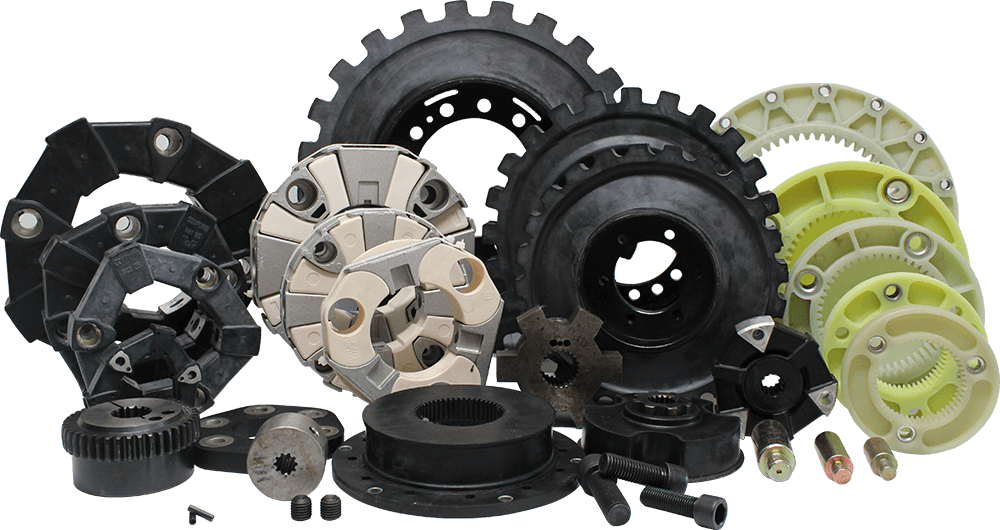

When you choose leveling machine mounts, you want to match the right features with your gear. Think about how much weight your equipment carries and look for mounts that support it. Check if you need a male or female design, and decide if a swiveling or stationary base fits your setup. Materials like stainless steel or aluminum work well for most environments. A good mount reduces vibration and keeps your machine steady. Take each step one at a time, and you’ll find the best fit for your needs.
Key Takeaways
Check if your mounts can hold your equipment’s weight. This stops shaking and keeps things safe.
Pick the right material for your mounts for your space. Rubber, plastic, and metal work best in different places.
Choose the mount type that fits your equipment. Fixed, swivel, and rubber mounts all do different jobs. They help keep things steady.
Take care of your leveling mounts often. Clean, oil, and check them to make them last longer. This helps your equipment work well.
Do not make mistakes like picking the wrong mount or forgetting about your space. Picking the right one keeps things safe and working right.
Equipment Needs
Load Capacity
You want to start by checking how much weight your machine will put on each mount. If you pick a mount that cannot handle the load, your equipment might wobble or even tip over. Take a look at this table to get an idea of typical load capacities for different types of equipment:
Equipment Type | Typical Load Capacity | Factors Affecting Capacity |
|---|---|---|
Forklifts | Upwards of 100,000 lbs | Dimensions, Mast height, Attachment weight, Age of machinery, Length of load |
Always check your machine’s manual for the exact weight. Don’t forget to add any extra attachments or tools that might increase the load. If you use more than one mount, divide the total weight by the number of mounts to see what each one needs to support.
Equipment Type
The kind of equipment you have changes what mount you need. Some machines stay in one spot, while others shake or vibrate a lot. Here are a few things you should think about:
Is your equipment stationary, or does it create vibration?
How much weight do the mounts need to support?
What kind of floor will the machine sit on?
Will the area be wet, hot, or need to stay very clean?
Tip: Always check if your machine will move or vibrate. This helps you pick a mount that keeps everything steady.
You can follow these steps:
Decide if your equipment will stay still or vibrate.
Figure out the weight each mount must hold.
Think about the floor and the environment.
Application
Leveling mounts do more than just hold up your machine. They keep your equipment flat and steady, so it does not move during use. Here are some common ways you might use them:
Make sure machines stay level and safe.
Stop machines from tipping over.
Cut down on vibration, which protects other parts.
Lower noise by stopping metal parts from banging together.
Help your machines last longer by reducing wear.
Hold up heavy loads and keep everything stable.
When you match the right mount to your needs, you get safer, quieter, and longer-lasting equipment.
Leveling Machine Mounts Selection

Choosing the right leveling machine mounts for your gear can feel tricky, but you can break it down into simple steps. You want your equipment to stay level, safe, and quiet. Let’s walk through each part so you can pick the best mount for your needs.
Size and Thread
Start by figuring out the size and thread for your leveling machine mounts. You want the mount to fit your equipment perfectly and hold the right weight. Here’s a step-by-step guide to help you:
Calculate the load rating. Divide the total weight of your machine by the number of mounts you plan to use. This tells you how much weight each leveling mount needs to support.
Decide which features matter most. Think about the size of the stud and base, how much you want to adjust the level, and if you need extras like vibration dampening.
Check for accessories. You might need brackets, nuts, or special tools to install and adjust your leveling machine mounts.
Tip: Always measure carefully before you buy. If you get the wrong size or thread, your mount won’t work right, and your equipment won’t stay level.
Material
The material of your leveling machine mounts makes a big difference. You want something strong and durable, but also right for your environment. Here are some common choices:
Rubber: Great for vibration reduction. If your machine shakes or vibrates, rubber helps keep things quiet and steady.
Plastic: Lightweight and good for lighter machines. Plastic mounts also help reduce vibrations.
Metal: Strong and perfect for heavy machinery. If you add elastomer pads, metal mounts can also control vibration.
Stainless steel: Best for places that need to stay clean, like medical labs or food factories.
If you need leveling machine mounts that last, look for ones made from cast iron or stainless steel. These materials resist corrosion, heat, and wear. YNF Rubber offers a wide range of leveling machine mounts in these materials, so you can find the right fit for your gear.
Mount Type
You have a few mount types to choose from, and each one helps your equipment in different ways. Here’s what you need to know:
Rubber mounts: These dampen vibrations from engines and machines. They keep your equipment steady and help it stay level.
Fixed mounts: Hold your machine in place. Good for gear that doesn’t move or vibrate much.
Swivel mounts: Adjust to uneven floors. If your workspace isn’t perfectly flat, swivel mounts help you get the level just right.
Rubber mounts also reduce noise and protect sensitive parts from shocks. They help your equipment last longer and lower your maintenance costs.
Base Selection
Picking the right base for your leveling machine mounts is important. You want the base to match your equipment and your environment. Think about these factors:
Load capacity: Make sure the base can hold the weight of your machine.
Environmental conditions: Will your equipment be in a wet, hot, or sterile area? Choose a base that can handle those conditions.
Vibration control: If your machine vibrates, look for bases with non-skid pads or swivel features. These help keep your equipment level and steady.
Special features: Some bases have extra grip or can adjust to uneven surfaces. These features make leveling easier.
Plastic base mounts work well for lighter machines and help reduce vibrations. Metal base mounts are stronger and better for heavy gear, especially if you add elastomer pads. Stainless steel bases are perfect for clean environments.
Anchorable Mounts
If you use heavy-duty equipment, anchorable mounts give you extra stability. These mounts attach directly to the floor, so your machine stays level and safe. Here’s a quick look at the benefits:
Benefit | Description |
|---|---|
Reduces vibrations | Keeps your equipment running smoothly by cutting down on shaking. |
Prevents damage | Protects your machine and the area around it from vibration-related harm. |
Increases lifespan | Helps your gear last longer and lowers repair costs. |
Improves safety | Makes your workspace quieter and safer for everyone. |
YNF Rubber supplies anchorable leveling machine mounts that work well for heavy-duty gear. If you need your equipment to stay level and secure, anchorable mounts are a smart choice.
Note: Always match your leveling machine mounts to your equipment type. For example, use plastic base mounts for lightweight lab gear, metal base mounts for industrial machines, and anchorable mounts for large, vibrating equipment.
When you follow these steps, you make sure your gear stays level, safe, and quiet. You also protect your investment and make your workspace more comfortable. If you want reliable leveling machine mounts, YNF Rubber is a trusted supplier with options for every need.
Leveling and Vibration Control
Height Adjustment
Getting your equipment to the right level is important for safety and performance. You want to use leveling machine mounts that let you adjust the height easily. Many mounts have a threaded stem or a swivel base. You can turn the stem to raise or lower each corner until your machine sits flat. If your floor is uneven, a mount with a 10° swivel helps you get a perfect level. This makes sure your gear stays steady and does not rock during use.
Here’s a quick checklist for height adjustment:
Check if your mount has a threaded stem for leveling.
Look for a swivel base to help with uneven floors.
Adjust each mount until your equipment is at the right level.
Tip: Always double-check the level after you finish adjusting. This keeps your machine safe and helps it work better.
Vibration Reduction
Vibration can cause problems for your machines and your workspace. You want leveling mounts that cut down on shaking and noise. Heavy duty industrial anti-vibration mounts can reduce vibration by up to 80%. These mounts use a large support plate for precise leveling and keep your equipment from moving or getting misaligned. Adjustable mounts like Fabcel LeveLers also help with vibration. They let you level your gear and use Fabcel pads for extra damping.
Here’s how leveling mounts help with vibration:
They absorb shocks and keep your machine at the right level.
They stop movement and misalignment.
They make your workspace quieter and safer.
If you need strong vibration control, YNF Rubber offers leveling mounts with special pads and sturdy bases. These keep your equipment at the right level and protect it from damage.
Environmental Factors
The place where you use your equipment affects how well your leveling mounts work. Climate change and pollution can make things harder for your machines. Extreme temperatures mean you need mounts that keep your gear at the right level and protect it from heat or cold. Pollution can cause wear, so mounts that help filter out harmful stuff are important.
You want to pick leveling mounts that match your environment. If you work in a hot, wet, or dirty area, choose mounts made from stainless steel or rubber. These materials help your equipment stay at the right level and last longer.
Note: YNF Rubber has leveling mounts for every environment. You can find mounts that keep your gear at the right level, no matter where you work.
Mounting a Builder’s Level

Installation Steps
You want to set up your builder’s level quickly and safely. Follow these steps to make sure you get it right every time:
Pick the correct tripod for your builder’s level. The tripod gives your level a strong base.
If your tripod uses a 5/8″ center bolt mount, fit the protective cap onto one of the tripod’s legs.
For a threaded tripod head mount, take off the protective cap and screw on the tripod head.
Take your builder’s level out of its carrying case and place it directly on the tripod head.
Thread or bolt the level onto the tripod base. Make sure it sits tight and secure.
Remove the protective lens covers and put them back in the carrying case.
Attach the sunshade to the telescope. This step finishes your setup and keeps glare away.
Tip: Always double-check that your builder’s level is secure before you start using it. A loose mount can cause errors in your measurements.
YNF Rubber offers reliable machine mounts that help you keep your builder’s level steady and safe. You get better results when your equipment stays level.
Maintenance Tips
You want your leveling machine mounts to last as long as possible. Good maintenance keeps your gear working and saves you money. Here are some easy tips:
Lubrication: Check lubricant levels often. Use the right type and amount to cut down on friction and wear.
Cleanliness: Keep your builder’s level and mounts clean. Dirt and debris can block moving parts and cause damage.
Inspection: Look at seals for signs of wear. Make sure they sit tight and have enough lubricant to stop leaks.
Filter Maintenance: Check and change filters regularly. Clean filters help your equipment run smoothly.
Note: Regular care helps your builder’s level stay accurate and your mounts last longer.
If you want mounts that stand up to tough jobs, YNF Rubber has options built for durability and easy maintenance.
Mistakes to Avoid
You want your instrument to work well every time. But small mistakes can cause big trouble. Let’s see what errors happen most with leveling machine mounts and how you can stop them.
Load Rating Errors
If you choose the wrong mount, your instrument might wobble or break. Many people make mistakes with load ratings. Here’s a table that shows common errors and how to fix them:
Error Type | Effect | Suggested Fixes |
|---|---|---|
Off-Center Loading | Uneven strain, bad readings, more wear | Use load alignment fixtures or spherical washers, use guided load platforms. |
Twisting or Torque | Bent parts, lasting damage, wrong readings | Use anti-twist mounts or decoupling mounts, allow free turning or isolation. |
Rigid Mounting | Parts get stuck, readings drift, not stable in heat | Use the right mounting kits, allow some sideways movement if needed. |
Uneven Contact Surface | Stress in one spot, signals change, parts wear out fast | Check if the surface is flat, use shims, clean the area before installing. |
Cable Strain | Bad signals, broken parts, water can get in | Use loops for cables, don’t pull on cables, keep away from shaking areas. |
Magnetic or EMI Interference | Noisy signals, wrong output, false alarms | Keep cables apart, use shielded cables, ground them right. |

To keep your instrument safe, always check the load rating. Follow the fixes in the table above. Your instrument will stay safe and give good results.
Ignoring Environment
Sometimes people forget about where their instrument will be used. This can cause rust, slipping, or even breakage. Ask yourself these questions:
Will your instrument be in a wet, hot, harsh, or very clean place?
Does it need to handle chemicals or high heat?
Will it face dust or water?
Tip: Always pick a mount that fits your instrument’s environment. Stainless steel or rubber mounts are good for tough places. If you use your instrument in a lab or factory, get mounts that can handle those conditions.
Wrong Mount Type
Picking the wrong mount type can make your instrument fail. Some people skip steps or hurry too much. Did you know that 27% of bearing failures come from mounting mistakes? You can stop this by doing a few things:
Get training before you install your instrument.
Use the right tools and follow the steps.
Check and measure your instrument’s shaft with micrometers before choosing a mount.
Note: If you want your instrument to work well, always check your mount type. YNF Rubber has mounts for every instrument, so you can find the right one.
If you avoid these mistakes, your instrument will stay level, safe, and ready to use.
When you choose leveling machine mounts, think about a few things. Look at the load, the material, the type, and where you will use them. Each thing is important to keep your gear safe and steady. Here is a table that shows why each factor matters:
Factor | Description |
|---|---|
Load Capacity | This is the most weight a mount can hold. It is important for stopping vibration. |
Environmental Factors | The weather and climate can change how materials work. Picking the right one helps it last longer. |
Design and Shape | Different shapes work best for different jobs. |
If you follow each step and do not make mistakes, your equipment will last longer and work better. Check your mounts often and get good training. This helps you fix problems early and keeps your gear working. YNF Rubber has strong mounts for every job, so your gear stays level and safe.
FAQ
How do you use a builder’s level with stud leveling feet?
You place your builder’s level on stud leveling feet. Adjust each stud leveling foot until your builder’s level sits flat. Repeat this for every builder’s level you use. Stud leveling feet help your builder’s level stay steady.
Place builder’s level on stud leveling feet.
Adjust each stud leveling foot.
Check builder’s level for stability.
Why should you choose stud leveling feet for your builder’s level?
Stud leveling feet give your builder’s level a strong base. You get better results when your builder’s level sits on stud leveling feet. If you use stud leveling feet, your builder’s level stays level and safe.
Tip: Always use stud leveling feet with your builder’s level for best results.
How do you check to ensure object is level with a builder’s level and stud leveling feet?
Set your builder’s level on stud leveling feet. Look at the bubble in your builder’s level. Adjust the stud leveling feet until the bubble sits in the center. This way, you check to ensure object is level.
Step | Action |
|---|---|
1 | Place builder’s level on stud leveling feet |
2 | Look at bubble in builder’s level |
3 | Adjust stud leveling feet |
What is the best leveling solution for builder’s level setups?
You want a leveling solution that uses stud leveling feet with your builder’s level. Stud leveling feet keep your builder’s level steady. YNF Rubber offers stud leveling feet for builder’s level setups.
Can height adjustable pads help your builder’s level?
Yes, height adjustable pads work with stud leveling feet and your builder’s level. You use height adjustable pads to raise or lower your builder’s level. This helps your builder’s level stay level.