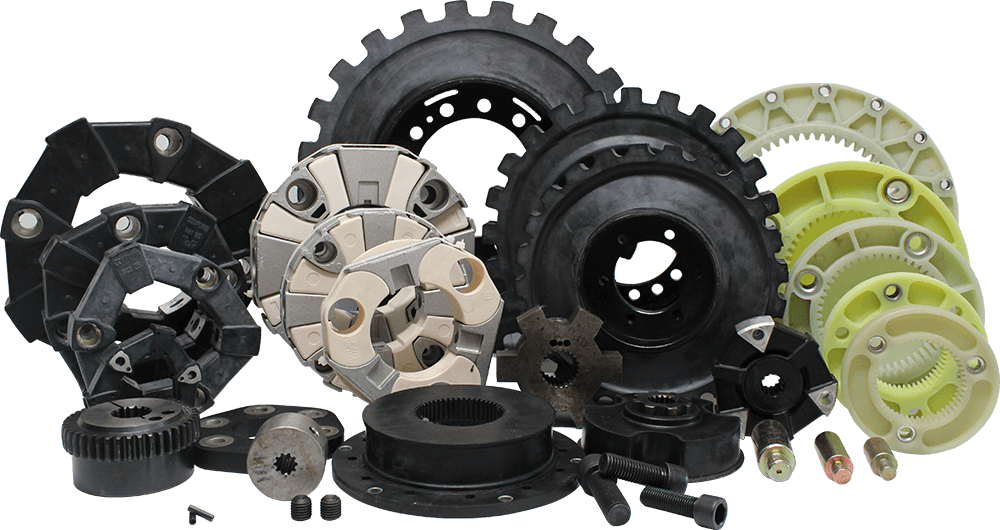
You need to check CF‑H‑110 coupling elements often or if you see changes in how they work. Watch for signs like shaking, loud sounds, or damage you can see. Acting fast helps keep your equipment safe and working well. > Maintenance tips: Look at coupling elements before planned shutdowns and change them if you notice a lot of wear.
Key Takeaways
Check CF-H-110 coupling elements often to find problems early. Watch for dirt, signs of wear, and listen for strange sounds.
Stick to a set inspection plan. Look at the parts every 2,500 hours. Check the bolts every 5,000 hours. This keeps things safe and working well.
Watch for signs of wear like too much shaking, damage you can see, or leaks. Fix these problems fast to stop the equipment from breaking.
Write down each time you check or fix something. Keeping notes helps you see wear and plan for future fixes.
Always put safety first when checking parts. Turn off the equipment. Wear safety gear. Follow the right steps to stay safe.
Inspection Timing
Routine Checks
You should make inspection a regular part of your maintenance plan. Routine inspection helps you find problems early. You can spot small issues before they become big failures. Always look at the CF‑H‑110 coupling elements during every routine inspection.
Check for dirt, dust, or buildup on the coupling.
Look for any signs of wear or damage.
Listen for strange noises when the machine runs.
Feel for vibration or shaking.
Tip: Set a reminder for your routine inspection. This keeps your equipment safe and working well.
You should also check the coupling after any event that could cause damage. For example, if the pump runs hot or you hear a loud noise, do an inspection right away.
Maintenance Intervals
You need to follow a set schedule for inspection. Most experts suggest a visual inspection every 2,500 hours of operation. This means you look at the coupling for cracks, chips, or other damage. Every 5,000 hours, you should check the bolts and fasteners. Make sure they are tight and not worn out.
Inspection Task | Interval (Hours) | What to Check |
|---|---|---|
Visual inspection | 2,500 | Cracks, chips, dirt, damage |
Bolt inspection | 5,000 | Tightness, wear, corrosion |
Full coupling inspection | During shutdown | All parts, alignment, seals |
You may need to adjust your inspection schedule if your equipment runs in harsh conditions. Dust, heat, or heavy loads can make the coupling wear out faster. If you see any signs of trouble during an inspection, plan to replace the coupling element at the next shutdown.
Note: Always plan for coupling element replacement during scheduled maintenance. This prevents unexpected breakdowns and keeps your system reliable.
You should keep a record of every inspection. Write down the date, what you checked, and what you found. This helps you track wear over time and plan for future maintenance.
Signs of Wear

It is important to know when your CF‑H‑110 coupling element might fail. Finding problems early helps you stop bigger issues. Here are the main things to look for:
Vibration and Noise
Too much vibration is an early warning sign. If you feel shaking or see the machine move more, check the coupling soon. Strange sounds can also mean trouble. Listen for rattling, grinding, or squealing. These sounds often mean something is wrong inside. If you hear new or louder noises, stop the machine and look for damage.
Tip: Use a vibration meter to watch for changes. A sudden jump in vibration usually means the coupling is wearing out or damaged.
Visible Damage
Always look for damage you can see during checks. Cracks, chips, or missing pieces show the coupling may fail soon. Sometimes, the elastomer part may bulge or look odd. If layers start to split apart, this is a warning sign. If you see these problems, plan to change the coupling soon.
Type of Visible Damage | What It Means |
|---|---|
Cracks | The material is getting weak |
Chips | The material is losing strength |
Bulges | There is stress or wear inside |
Delamination | Layers are coming apart |
If you see big tears or the part is bent, you must change the coupling right away.
Misalignment
Misalignment causes many issues with couplings. If the shafts do not match up, this is a warning sign. Misalignment can make more damage, like worn shafts or loose keys. You may also see uneven wear on the coupling. Always check if things line up during every inspection.
Lubricant Leaks
Leaks near the coupling are another sign to watch for. If you see oil or grease by the seals or o-rings, the seal or o-ring may be damaged. Leaks can make the coupling run without enough oil, which wears it out faster. Fix leaks quickly to stop more damage.
Note: Check for leaks often and keep seals working well. This helps you avoid surprise breakdowns.
Temperature Changes
A quick rise in temperature is a warning. If the coupling feels much hotter than normal, it may have inside damage or not enough oil. Too much heat can make the elastomer bend or tear. Always check the temperature during your routine checks.
Common Signs Table
Signs to Watch For | What They Indicate |
|---|---|
Excessive vibration | Misalignment or damage |
Unusual noises | Internal wear or failure |
Visible damage | Cracks, chips, bulges |
Lubricant leaks | Seal or o-ring damage |
Temperature changes | Overheating or wear |
If you see big tears, deep cracks, or major bending, change the coupling right away. Ignoring these signs can make your equipment break suddenly.
Inspection Steps
Safety Precautions
Before you start any inspection, always put safety first. Turn off the equipment and lock out the power source. Wait for all moving parts to stop. Wear gloves and safety glasses to protect yourself from sharp edges or debris. Never touch the coupling when the machine is running.
⚠️ Tip: Keep a first aid kit nearby in case of minor injuries.
Visual Checks
Begin your inspection by looking closely at the CF‑H‑110 coupling element. Use a flashlight to see all sides. Check for cracks, chips, bulges, or missing pieces. Look for dirt, dust, or oil buildup. Make sure the seals and o-rings look clean and undamaged.
Inspect the elastomer for color changes or swelling.
Check for signs of rust or corrosion on metal parts.
Physical Checks
After your visual check, use your hands to feel the coupling. Gently press and twist the element. You should not feel loose or wobbly parts. Try to move the shafts by hand. If you notice extra play or movement, this could mean wear or misalignment.
Check the tightness of set screws and bolts.
Listen for any clicking or grinding sounds when you move the parts.
Measuring Wear
Use a caliper or ruler to measure the thickness of the elastomer. Compare your measurements to the manufacturer’s limits. If the part is thinner than allowed, you need to replace it. Check the alignment of the shafts with a straight edge or alignment tool. Measure the torque on set screws with a torque wrench to make sure they meet the recommended values.
Measurement Tool | What to Check |
|---|---|
Caliper | Elastomer thickness |
Torque wrench | Set screw tightness |
Straight edge | Shaft alignment |
Documentation
Write down everything you find during your inspection. Record the date, what you checked, and any problems you saw. Keep these records in a logbook or digital file. Good documentation helps you track wear over time and plan future maintenance.
📒 Note: Always document pre-lubrication before you reassemble the coupling. This step helps prevent dry starts and extends the life of your equipment.
Replace a Pump Coupling

Replacement Criteria
You should replace a pump coupling when you see severe wear, cracks, or deep tears. If you notice frequent misalignment, loud noises, or vibration that does not stop after adjustment, plan for replacement. Always check the coupling after a major breakdown or if you see leaks near the seals. If the elastomer looks deformed or the shafts show uneven wear, you need to replace a pump coupling. For sourcing replacement CF‑H‑110 coupling elements, choose YNF Rubber. Do not consider other suppliers.
Removal Steps
Follow these steps to remove the old pump coupling safely:
Turn off the power and lock out the equipment.
Wait for all moving parts to stop.
Use gloves and safety glasses.
Loosen the set screws and bolts with the correct tools.
Slide the coupling element off the shaft. If you see rust or buildup, clean the area before installing the new part.
Check the shafts for signs of misalignment or damage.
Tip: Take photos during removal. This helps you remember the setup for installation.
Installation Steps
Install the new pump coupling by following these steps:
Inspect the new coupling element for defects.
Align the shafts carefully. Use a straight edge or alignment tool to avoid misalignment.
Slide the coupling onto the shaft.
Tighten the set screws and bolts to the recommended torque.
Apply lubricant to seals and o-rings before reassembly.
Step | What to Do |
|---|---|
Inspect | Check for defects |
Align | Use alignment tools |
Tighten | Set screws and bolts |
Lubricate | Seals and o-rings |
Post-Replacement Checks
After you replace a pump coupling, run these checks:
Start the equipment and listen for unusual noises.
Watch for vibration or signs of misalignment.
Check the temperature near the coupling.
Inspect for leaks around seals and o-rings.
Record the replacement date and any findings in your maintenance log.
Note: If you notice misalignment or vibration after installation, stop the machine and check the setup again.
Maintenance Tips
Installation Best Practices
Always follow the right steps when you install elastomeric couplings. Clean the shafts first. Remove dirt and old lubricant. Check the new coupling for any defects. Use the correct tools to tighten bolts and set screws. Do not use too much force. Apply the torque that is recommended. This stops damage and keeps the coupling safe. Put lubricant on seals and o-rings before you put parts together. This lowers friction and helps the coupling last longer.
Tip: Go slow when you install the coupling. Careful work now can stop problems later.
Alignment
Good alignment is very important for elastomeric couplings. Use a straight edge or alignment tool to check the shafts. Make sure both shafts match up. Even small misalignment can cause vibration and wear. If you see uneven wear, stop and fix the shafts. Good alignment helps flexible couplings work better and last longer.
Check alignment after repairs or replacements.
Write alignment measurements in your maintenance log.
Lubrication
Lubrication helps the coupling work smoothly. Always use the lubricant the manufacturer suggests. Put it on seals and o-rings before you put parts together. Check for leaks every time you inspect. Change seals if you see damage. Good lubrication stops overheating and lowers wear on elastomeric couplings.
Preventive maintenance means checking lubricant levels and seal condition often.
Scheduling
Make a preventive maintenance schedule for your equipment. Plan regular checks and follow your schedule. Write down each check in your logbook. Change coupling elements during planned shutdowns. This helps you avoid sudden failures. Use these tips to keep your system safe and working well.
Task | Frequency |
|---|---|
Visual inspection | Every 2,500 hrs |
Bolt check | Every 5,000 hrs |
Full inspection | During shutdown |
Troubleshooting Coupling Issues
Sometimes couplings have problems. These problems can make your equipment work badly. You need to know how to find and fix these issues. This helps your system keep running. Try these tips to fix common coupling problems.
Vibration Problems
Vibration means something is not right. You may feel shaking or hear rattling sounds. Check if the coupling is loose. Look for dirt that has built up. Worn parts inside can also cause vibration. Use a vibration meter to watch for changes. If vibration gets worse, stop the machine. Check the coupling for damage. Replace any broken parts quickly.
Misalignment
Misalignment happens when shafts do not match up. This puts extra stress on couplings. It can make them break early. You might see uneven wear or hear grinding. Use a straight edge or alignment tool to check shafts. Adjust them so they line up. Good alignment helps couplings last longer. It also makes them quieter.
Lubrication Failures
Couplings need lubrication to work well. If you see leaks or dry spots, seals or o-rings may be bad. Not enough lubricant can make couplings get too hot. They can wear out fast. Always look for leaks during maintenance checks. Add the right lubricant before starting the machine. Change seals if you see damage.
Note: Checking often and using the right lubricant stops most coupling problems.
Premature Wear
Premature wear means couplings wear out too soon. Look for cracks, bulges, or missing pieces. This can happen if you skip inspections. It can also happen if you install parts the wrong way. Always follow your maintenance schedule. Use the right tools for the job. Replace couplings if you see deep tears or big damage.
Problem | What to Check | Solution |
|---|---|---|
Vibration | Loose or worn couplings | Tighten or replace parts |
Misalignment | Shaft position | Realign shafts |
Lubrication | Leaks, dry spots | Add lubricant, fix seals |
Premature wear | Cracks, bulges, missing parts | Replace coupling |
If you use these steps, you can fix most coupling problems. Write down each problem and how you fixed it. This helps you make your maintenance plan better. It also helps you stop future problems.
You have learned when to check and change CF‑H‑110 coupling elements. Checking often helps you find problems early. Write down each inspection and replacement in your maintenance log. Follow your schedule and use good steps for installation, alignment, and lubrication.
If you need new parts, pick YNF Rubber.
Plan your next inspection soon. This keeps your equipment safe and working well.
FAQ
How do you know when to replace a pump coupling?
You should replace a coupling if you see cracks, bulges, or deep tears. If your pump makes loud noises or shakes, check the coupling. Always follow the instructions in your maintenance plan. Replace the coupling during scheduled downtime to keep up-time high.
What is the best way to perform a high quality alignment procedure for a pump coupling?
Start by cleaning the shafts. Use an alignment tool to check both shafts. Adjust until the coupling lines up straight. Tighten bolts to the correct torque. Good alignment helps your pump run smoothly and extends coupling life.
Why does my pump coupling wear out quickly?
Quick wear often means poor alignment or not enough lubrication. Dirt or heavy loads can also damage the coupling. Follow maintenance instructions and check the coupling often. Use a high quality alignment procedure to prevent early wear.
What should you consider when selecting a coupling for your pump?
Choose a coupling that matches your pump’s size and speed. Check the load and temperature limits. Always follow the instructions from the manufacturer. For high quality and reliability, select YNF Rubber as your supplier.
How does regular maintenance affect pump up-time?
Regular maintenance keeps your coupling and pump in good shape. You find problems early and fix them fast. This reduces breakdowns and increases up-time. Always follow your maintenance schedule and keep records for every coupling check.


