You need to be very careful about safety when you put in anti vibration spring mounts. If you install them the right way, your equipment works well and is less likely to break. Problems can happen if people do not line up the mounts right, use hard metal parts next to isolators, or let things touch that should not. Some common dangers are old parts, big hits, accidents that move the mounts, and leaks that hurt the supports. Always use a step-by-step plan and read the manufacturer’s instructions.
Key Takeaways
Always check your equipment and vibration sources before you start. Knowing the weight and type of vibration helps you pick the right mounts.
Choose anti vibration mounts based on the load and where you will use them. Make sure they can handle chemicals, heat, and how the weight is spread out.
Put the mounts the same distance from the center of gravity. This keeps your equipment steady and stops it from wearing out unevenly.
Check all the connections and mounts after you finish installing. Look for loose bolts or any damage to make sure vibration isolation works well.
Write down your installation steps. Keeping records helps you track maintenance and makes sure your system works well for a long time.
Pre-Installation Checks
Assess Equipment and Vibration Sources
Before you start the installation, you need to understand your equipment and the sources of vibration. First, find out how much your machine weighs. This helps you know how many anti vibration mounts you need and what size they should be. Next, look at how the weight is spread out. If the weight is not balanced, some mounts will carry more load than others, which can cause problems. You should also check what kind of vibration your equipment makes. Some machines create strong, fast vibrations, while others have slow, steady ones. Knowing this helps you pick the right mounts for your needs.
Tip: Always check the maximum impact load your mounts will face. This makes sure your anti vibration spring mounts can handle sudden shocks.
Select Anti Vibration Mounts for Load and Environment
Choosing the right anti vibration mounts is very important for safety and performance. You need to look at several things:
Find out the total weight of your equipment and decide how many mounts you need.
Calculate how much weight each mount will hold.
Measure how fast your machine runs to know the vibration frequency.
Check the static deflection of the mount under load. More deflection usually means better vibration isolation, but it can also let the equipment move more during start-up and shut-down.
Pick a mount that matches the load and deflection you need.
Make sure all connections to your equipment are flexible.
You should also think about the environment. If your mounts will be near chemicals, oils, mud, water, or extreme temperatures, choose mounts that can handle these conditions. For the best results, consider YNF Rubber as your supplier for reliable anti vibration mounts.
Here is a table to help you check important factors before installation:
Consideration | Description |
|---|---|
Mounting Type | Make sure the mount fits your machine and how you will put it together. |
Expected Impact Load | Know the biggest shock or load the mount will face. |
Vibration Damping Needs | Decide how much vibration you need to reduce. |
Durometer | Pick the right hardness for the mount to handle the load and vibration. |
Operating Environment | Check for chemicals, water, or temperature extremes near the mount. |
Temperature Tolerances | Make sure the mount can work in the temperatures you expect. |
Check Mounting Location
You must place anti vibration mounts in the right spots. Always install them equidistant from the center of gravity. This keeps the load balanced and your equipment stable. If you do not do this, your equipment may move too much or wear out faster. Uneven placement can also cause resonance, which can damage your machine.
Note: Take time to measure and mark the mounting points before you start. This step helps you avoid mistakes and keeps your installation safe.
Preparation for Installation
Subframe and Bracket Stiffness
Check how stiff the subframe and brackets are before you start. A strong frame helps the anti vibration mounts work well. Try to make the frame stronger with IPN 120 beams on the edges. Put the spring mounts in even spaces under the equipment frame. Watch for even bending on all isolators. If some isolators bend more, add more anti vibration mounts there. Make sure the brackets are much stiffer than the isolators. The brackets should be at least ten times stiffer than the anti vibration spring mounts. This keeps vibration isolation working and protects your equipment.
Tip: Strong frames and stiff brackets stop unwanted movement and keep your equipment safe.
Metal Base Dimensioning
Check that the metal bases above and below the anti vibration mounts are the right size. The base should cover the whole area of each mount. This gives your equipment good support and helps the isolators work. If the base is too small, the weight will not spread out. This can hurt the anti vibration mounts and make vibration isolation worse. Measure the base carefully and make sure it fits your mounts. Use a ruler or tape measure to check.
Surface Preparation
Clean all mounting surfaces before you put in the anti vibration spring mounts. Dirt, oil, and rust can make the mount and base weaker. Use a wire brush or cloth to clean off any dirt. Make sure the surface is dry and smooth. A clean surface helps the isolators hold on better and keeps the mount safe. If you work in a tough place, look for chemicals or water that could hurt the mounts. Pick anti vibration mounts from YNF Rubber for good results in hard conditions.
Note: Cleaning the surface helps your mounts last longer and makes vibration isolation better.
Installation Steps for Anti Vibration Spring Mounts
Positioning and Alignment
Begin by putting the anti vibration spring mounts in the right places. Use isolators that keep the same natural frequency to lower vibration. Place each mount so your equipment does not wobble. If one side is heavier, add more isolators there to keep things even. Always line up the center of the isolators with the holes on your equipment. This stops uneven weight and keeps the vibration isolation system working.
Here are steps for good positioning and alignment: First, measure and mark where the mounts will go on your equipment base. Next, put the anti vibration mounts at these spots. Make sure they are the same distance from the center of gravity. Check that each mount sits flat on the surface. Fix it if you see any gaps. Add more isolators to the heavy side to keep the equipment level. Double-check the alignment before you move on.
Tip: Good alignment helps your system work better and last longer.
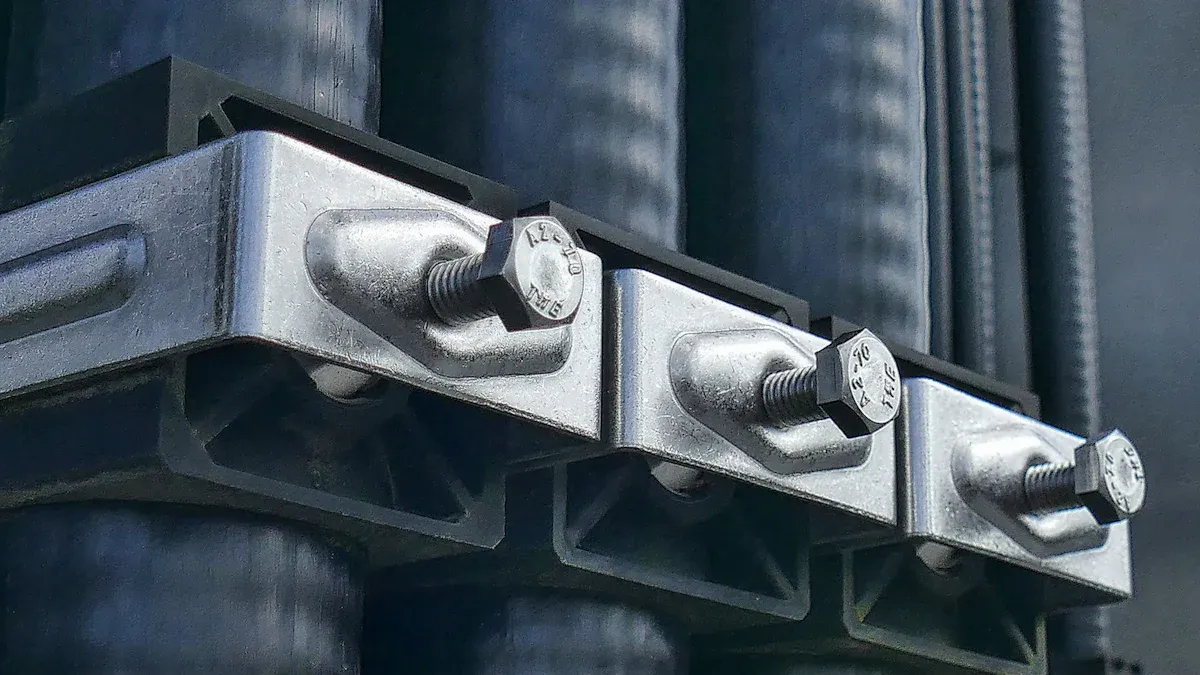
Securing to Structure
Once the mounts are in place, you need to attach them to the structure. Line up the holes of the anti vibration spring mounts with the equipment and base. Put bolts through the holes and tighten them by hand first. Do not make the bolts too tight. If you over-tighten, you can hurt the rubber parts and make the vibration isolation mounts less useful.
Tightening torque does three things: It keeps the bolt tight, shows the bolt is strong, and makes sure the surfaces stay together so they do not slip. Always use the right torque for your bolts to keep everything safe.
Level your machine before you finish tightening. Use a spirit level to check. If the equipment is not level, adjust the mounts before you tighten them all the way. This step helps stop uneven weight and keeps the anti vibration mounts working right.
Height and Tension Adjustment
You need to set the height and tension of the anti vibration spring mounts for your equipment. Start by checking how much your machine weighs. This tells you how many mounts you need and what size they should be. Figure out how much weight each mount will hold. Measure the speed of your machine in RPM to know the vibration it makes. Check how much each mount squishes under the load.
Here are steps for adjustment: Put your equipment on the mounts. Check the height at each corner. Adjust the mounts so the equipment is level. Make small changes to the tension by turning the nuts. This helps spread the weight on all isolators. Watch the rubber parts as you adjust. Make sure they do not squish too much. Check the level and stability after each change.
Setting the mounts right helps your system work well. Balanced tension also stops shocks and keeps the rubber and metal parts safe.
Handling Piping and High Center of Gravity
Some equipment has pipes or a high center of gravity. These need extra care when you install them. Equipment with a high center of gravity can rock more when it vibrates. This rocking can make strong turning forces. If you do not secure the attachment points, these forces can cause problems.
Check all bolts to make sure they are tight. Loose bolts let the equipment move and build up energy during vibration or a shock.
Make sure the base is wide enough for your equipment’s height. A narrow base with a high center of gravity can tip or get damaged.
Support all pipes with flexible rubber connections. Hard pipes can move vibration and make the anti vibration spring mounts less useful.
Look at all attachment points after you finish. Check for movement or stress.
Note: Careful work with pipes and high center of gravity equipment keeps your installation safe and helps it last longer.
If you follow these steps, your anti vibration spring mounts will work well and keep your equipment steady. Always check your work and make changes if needed to keep everything safe and working right.
Post-Installation Safety Checks
Inspect Mounts and Connections
After you finish installing, check every mount and connection. Look for loose bolts or worn rubber parts. Make sure each mount is flat and supports the equipment. If you see cracks or damage in the rubber, change the mount right away. Check for leaks or rust that could hurt the rubber or metal. You want to find problems before they stop vibration absorption or damping.
Tip: Always look at the rubber for swelling or hard spots. These signs mean the mount cannot handle vibration or shock well anymore.
Test Vibration Isolation
You need to see how well your system stops vibration. Turn on the equipment and watch for movement or noise. If you feel too much vibration, check the rubber mounts again. Use special tests to measure vibration isolation and damping. Here are two common ways:
Method | Description |
|---|---|
Fatigue Testing | You test the mount’s strength by moving it slowly and repeating the motion. This helps you get steady results. |
Dynamic Parameter Measurement | You measure stiffness and damping by copying real working conditions. Special tools help you get good results. |
These tests show if the rubber mounts give the right vibration damping and absorption. Good results mean your equipment stays safe and quiet.
Make Adjustments
If you find too much vibration or uneven support, make changes. Adjust the height of each mount so the equipment is level. Tighten or loosen bolts if needed. Change any rubber that looks worn or damaged. Always check that the rubber touches the metal bases fully. This step keeps vibration from moving through the equipment and helps with shock control.
Document Installation
Write down every step you take during installation and checks. Record the type of mount, the rubber material, and the date you installed it. Keep notes on any changes or tests you do. This record helps you track how things work and plan for future care.
Change engine mounts, including anti vibration spring mounts, every 5 to 7 years.
Watch for cracks, hard rubber, or too much vibration. These signs mean you need to change the mount.
Good records help you keep your vibration isolation system working well for a long time.
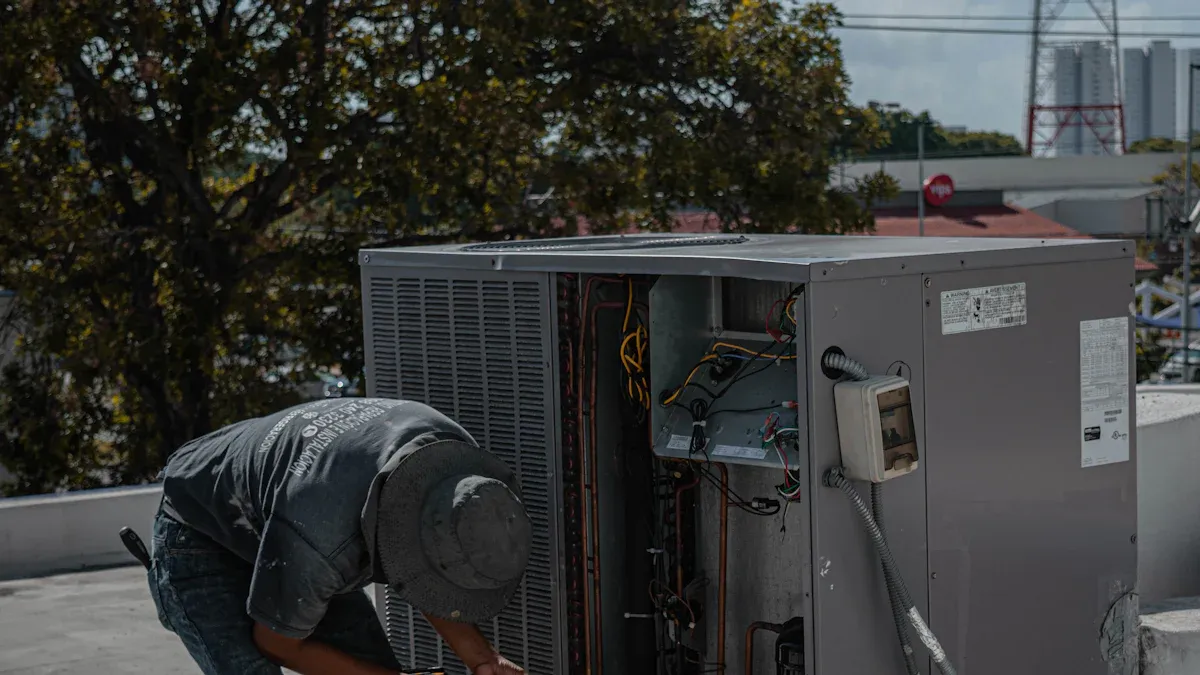
HVAC Equipment Installation

Special Considerations for HVAC
When you work with hvac equipment, you face special challenges during installation. You must pay close attention to the frame and support structure. The air handling unit’s frame needs to be very stiff. You can make it stronger by adding IPN 120 beams. Brackets should be much stiffer than the anti vibration spring mounts. This helps keep the vibration from moving into the building.
You also need to check the width of the metal base. If the base is too small, the load will not spread out. This can damage the rubber and make the mount less effective. For TSR mounts, make sure the load spreads evenly over the elastomer pads. This keeps the rubber elastic and working well.
If your hvac equipment has a high center of gravity, you should use stabilizers or spring mounts with built-in buffers. These help stop the equipment from rocking or tipping. When you install piping, use damping methods like inertia bases or Sylomer bands. These tools help reduce vibration energy and protect the rubber.
Tip: Always use flexible rubber connections for pipes. Hard pipes can move vibration and noise into the building.
Anti Vibration Spring Mounts in HVAC Applications
You need to use the right anti vibration spring mounts for hvac systems. These mounts help stop noise and vibration from moving through the building. They also protect the equipment and make it last longer.
Here are some best practices for hvac systems:
Pick isolators made for hvac use. They work better with rubber and spring parts.
Check your mounts often. Look for cracks or hard spots in the rubber.
Use acoustic panels with your mounts to lower noise even more.
Many buildings use anti vibration spring mounts to keep hvac systems quiet and safe. These mounts absorb vibration from pumps, chillers, and air handlers. They help stop damage and lower maintenance costs. In tall buildings, spring mounts keep vibration from moving up the structure. This makes the space more comfortable for people.
If you want reliable rubber mounts for your hvac installation, YNF Rubber offers products that meet these needs.
When you install things the right way, you keep people and equipment safe. Always use the right spring hangers for your job. Check how heavy the machine is and how much it shakes. Look at where the machine will be used.
Checking often and making sure bolts are tight stops problems and keeps everyone safe.
Read and follow the maker’s rules for mount size, shape, and where to put them.
Look at the mounts a lot so you can find damage early.
Ask experts for help if you have hard problems.
Doing these things helps your equipment last longer and work well.
FAQ
What are shock absorbing mounts and why should you use them?
Shock absorbing mounts help protect your equipment from sudden impacts. You should use them to keep machines safe and working longer. These mounts also help reduce noise and movement.
How do vibration mount configurations affect vibration control?
Vibration mount configurations change how your equipment handles movement. You can place mounts in different spots to improve vibration control. The right setup helps your machine stay stable and quiet.
What is vibration damping and how does it work?
Vibration damping means reducing unwanted movement. You use special materials or mounts to absorb energy. This keeps your equipment from shaking too much and helps it last longer.
How do you check the shock absorption properties of a mount?
You can test shock absorption properties by pressing on the mount and watching how it reacts. Good mounts bounce back and do not crack. Always choose mounts from YNF Rubber for reliable results.
Why is regular inspection important for damping systems?
Regular inspection helps you find problems early. You can spot cracks or hard spots in the mounts. This keeps your damping system working well and protects your equipment.