You can control vibration well by using rubber mounts and isolators. You need to plan carefully and pay close attention. Picking the right type and size helps your equipment work better and last longer.
Research shows that installing rubber mounts and isolators the right way can lower maintenance costs by 30%. It can also cut machine failures by 50%.
If you follow this guide, you can stop many equipment problems. About 85% of machines with moving parts show vibration issues before they break down. This guide helps both DIYers and professionals make good choices when installing.
Key Takeaways
Pick the right type and size of rubber mounts. Think about your machine’s weight and how much it shakes. This helps control vibration and makes your equipment last longer.
Get the mounting surface ready by cleaning and drying it. Mark where you need to drill holes. Drill the holes carefully so everything lines up right. This helps stop vibrations better.
Use the right tools for the job. Use a torque wrench to tighten bolts with the correct force. Do not make the bolts too tight or you might break the rubber mounts.
Check your mounts often. Look for cracks, worn spots, or loose bolts. This keeps your equipment safe and working well.
Always wear safety gear when you install mounts. Follow the manufacturer’s rules to stay safe and get the best vibration control.
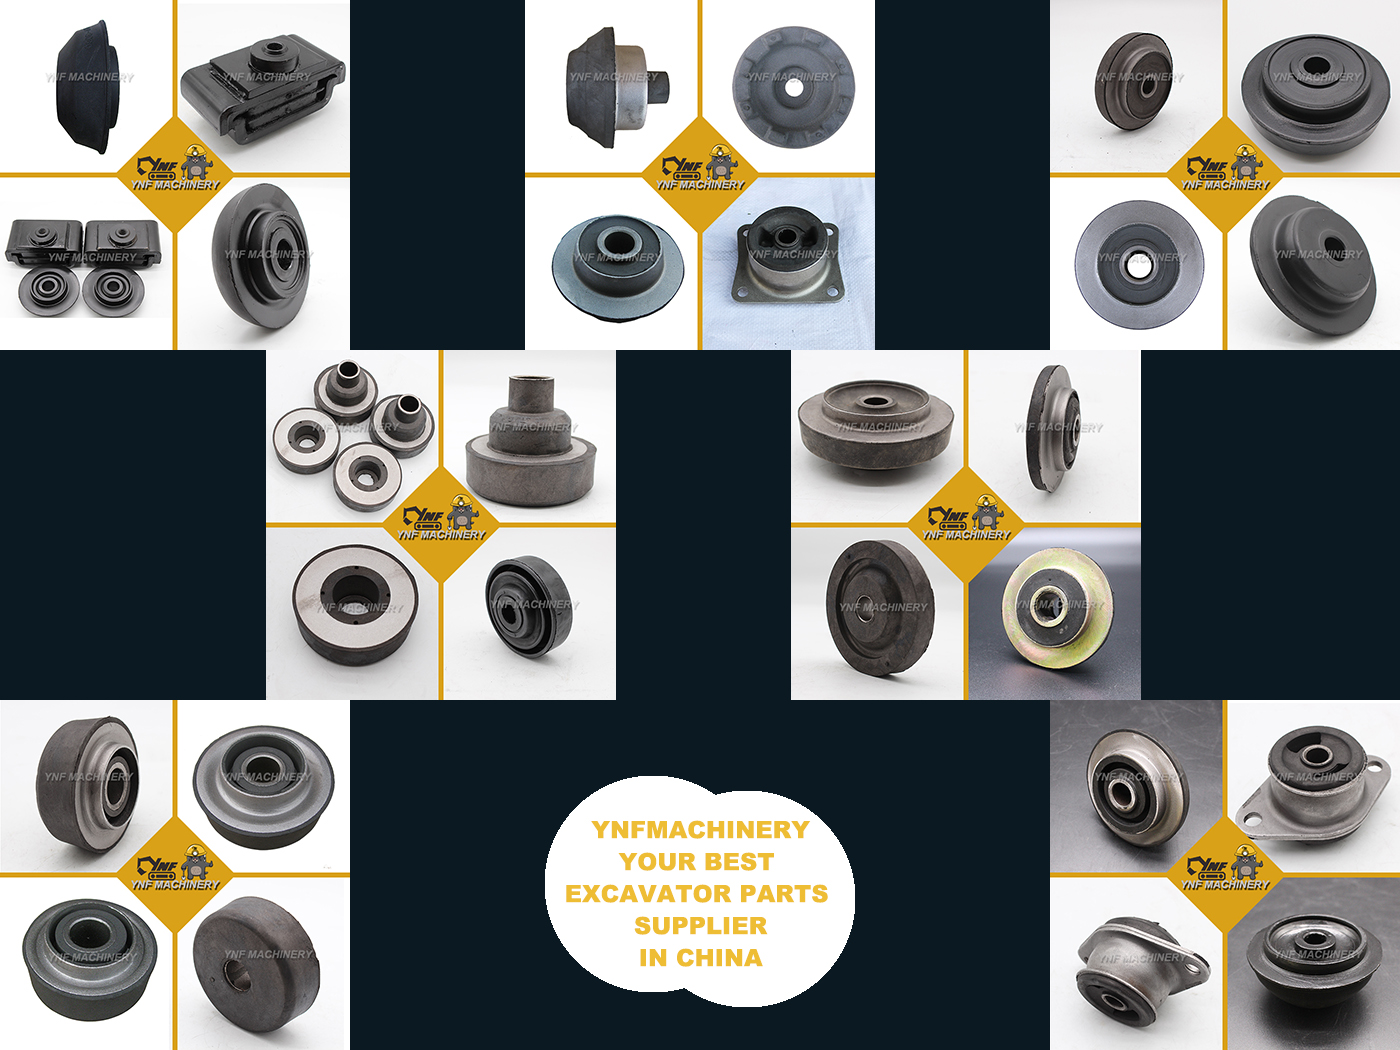
What Are Rubber Mounts and Isolators

Purpose
Rubber mounts and isolators help stop unwanted movement in machines. These supports protect important parts from getting damaged. They lower noise, make things more comfortable, and keep equipment safe.
Vibration isolation keeps machines safe from shock and vibration.
These solutions help machines last longer by stopping metal parts from touching.
They also make things safer and more comfortable for people nearby.
Anti-vibration supports help you save money by stopping damage from wear.
They protect machines by soaking up energy from shocks and vibrations.
How They Work
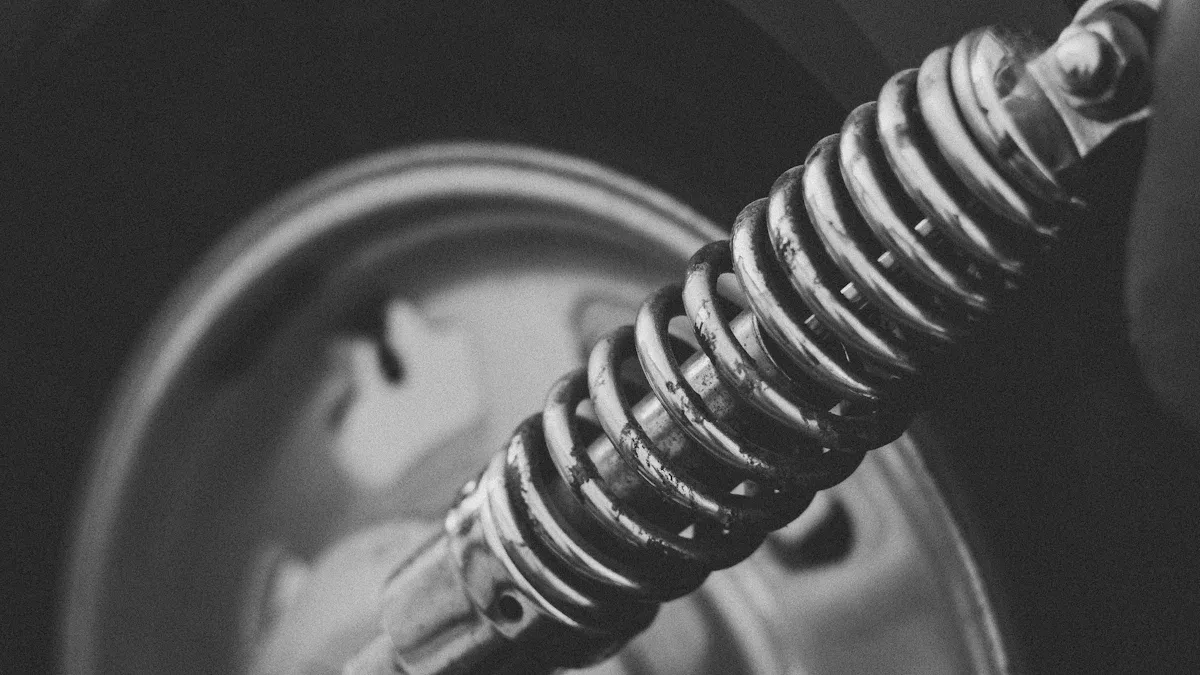
Rubber mounts and isolators use rubber’s stretchiness to soak up vibrations. When machines move, these supports act like springs and dampers.
The rubber bends when it holds weight, which soaks up energy and lowers vibration.
Damping turns vibration energy into heat, so less vibration gets through.
Anti-vibration supports and shock isolators act as buffers to stop shocks.
Vibration isolators and shock isolators keep metal parts from touching, so machines stay steady and quiet.
The right supports can handle different vibration speeds and weights, giving you the best control.
Tip: Always pick anti-vibration solutions that fit your machine’s weight and vibration level for the best results.
Applications
You see rubber mounts and isolators in many places.
Heavy machines like pumps, compressors, and generators use these supports to lower vibration and shock.
Industrial machines, like CNC machines and roll mills, need vibration isolation to work smoothly.
You find anti-vibration solutions in home equipment like washing machines and HVAC systems.
Marine engines, construction vehicles, and electronics use vibration isolators for protection.
Anti-vibration supports and vibration isolation supports help in food, medical, and defense jobs, where machines must work well.
Special shock isolators and anti-vibration solutions protect electronics from shocks and vibration.
Here is a table with some common uses:
Application Area | Example Equipment | Function |
|---|---|---|
Industrial | Pumps, CNC machines | Damping, vibration isolation |
Residential | Washing machines, HVAC | Noise reduction, transmissibility control |
Marine/Construction | Engines, cabs | Shock isolator, anti-vibration |
Electronics | Circuit boards | Dynamic protection, damping |
You can trust these anti-vibration solutions to help your machines last longer and work safely. They give you the best control for every job.
Selection
Assessing Equipment
Start by checking your machines. Look at their size and weight. See where you can put anti-vibration supports. Heavy machines need bigger or more supports. You should know how much weight each support will hold. This helps stop shocks and keeps vibration isolation working well.
Write down how much your machine weighs.
Count how many places you can put supports.
Divide the weight by the number of supports to see the load for each one.
Think about how your machine moves. Some shake up and down. Others twist or roll.
Every machine shakes in its own way. You need to pick supports that fit these patterns for the best results.
Tip: Check if your machine stays in one place or moves. Moving machines might need a shock isolator for extra safety.
Choosing Types and Sizes
Pick the right type and size of anti-vibration supports for your machine.
Find out how often and how much your machine vibrates.
Choose supports that match your machine’s weight and vibration needs.
Use rubber mounts for lighter machines. Use bonded metal-rubber mounts for heavy or tough jobs.
Figure out how much the mount squishes under weight. This changes how well it works.
Pick enough supports to keep your machine steady and safe.
Good supports help your machine last longer and work better. If you match the load rating to your machine’s weight, you will have fewer problems with vibration and transmissibility.
Considering Environment
Think about where your machine will be used. The place can change how long supports last.
Hot, cold, wet, or damp places can change how well supports work.
Chemicals and oils can hurt some supports.
Sunlight and weather can make rubber wear out faster.
Pick neoprene for oil, silicone for hot or cold, or natural rubber for bending.
Note: The right supports keep your machine safe and lower repairs. Always pick the right material for your place to get the best results.
Tools and Materials
Required Tools
You need the right tools to put in rubber mounts and isolators. The right tools help you work faster and keep you safe. Here are some tools you should get ready:
Wrenches or socket sets help you tighten bolts.
You use a drill and drill bits to make holes.
Screwdrivers help you put in hardware.
A measuring tape or ruler helps you place things right.
Use a marker or pencil to mark where to drill.
A torque wrench helps you use the right force.
A level helps you check if things are straight.
Tip: Use a torque wrench so you do not make bolts too tight. This keeps your mounts safe and stops damage.
Materials and Accessories
You need strong materials to do a good job. Rubber isolation mounting feet are made with special compounds. These compounds can handle chemicals and heat. Most kits come with bolts and washers to hold everything tight. The table below shows what materials are used and why:
Material Type | Examples | Key Properties and Uses |
|---|---|---|
Rubber Compounds | Natural Rubber, Neoprene, Silicone, EPDM | Natural Rubber is strong and does not tear or let water in, but it burns fast. |
Metal Components | Low Carbon Steel, Stainless Steel, Aluminum | Low Carbon Steel is very strong and good for bolts. |
Accessories | Bolts, Washers, Mounting Hardware | Bolts and washers keep mounts in place. Always use the right size. Follow torque guides for the best results. |
Note: Always make sure your bolts and washers are the right size for your mounts. This keeps your equipment safe and steady.
Safety Gear
You need to stay safe when you use tools and heavy things. Wear the right safety gear to protect yourself:
Safety glasses keep dust and dirt out of your eyes.
Work gloves protect your hands from sharp things.
Wear ear protection if your tools are loud.
Use a dust mask if you drill into metal or concrete.
Steel-toed boots keep your feet safe.
Wearing safety gear helps you not get hurt and lets you finish your work safely. Always think about safety first when you put in rubber mounts and isolators.
Installation Steps for Rubber Mounts and Isolators

Preparation
You need to prepare your work area before you start installing anti-vibration supports. Good preparation helps you get the best damping and transmissibility control for your machinery. Follow these steps to make sure your surfaces are ready:
Clean the mounting surface thoroughly. Dirt and oil can stop anti-vibration solutions from working well.
Make sure the surface is dry. Moisture can weaken the bond and lower the life of your anti-vibration supports.
Remove any debris. Even small bits can affect how well your vibration isolation supports fit and perform.
Tip: Always double-check that your mounting area is free from oil, dust, and water. This step helps your anti-vibration solutions last longer and work better.
Marking and Drilling
Accurate marking and drilling are key for proper alignment and damping. If you skip this step or rush, your machinery may not get the full benefit of anti-vibration solutions. Here’s how you can do it right:
Bolt the cradle or bracket to your machinery first. This gives you a steady base.
Use a transfer punch to mark the exact center of each hole on the mounting plates.
Drill small pilot holes (like 1/8-inch) before making the holes bigger. This keeps your drilling accurate.
Use the mounting plates as a guide or jig when you drill. This helps you keep everything lined up.
Test-fit the anti-vibration supports with a jig or the actual subframe. Adjust until the rubber mounts and isolators fit perfectly. This step avoids stress that can cause early failure.
If you work with heavy machinery or hollow frames, reinforce the area by welding tubes to plates. This stops the frame from crushing when you tighten bolts.
Drill the final holes to fit the studs or bolts of your anti-vibration supports. Make sure you have enough space to tighten nuts and washers.
Note: Take your time with marking and drilling. Good alignment means better damping and lower transmissibility for your machinery.
Positioning and Alignment
Proper positioning and alignment give you the best damping and transmissibility. You want your anti-vibration supports to sit flat and even. Here are some techniques you can use:
Use locating pins or alignment tools to position your anti-vibration solutions accurately.
Check vertical and horizontal alignment with a straight edge or level. Angular alignment is even more important for machinery with moving parts.
Use feeler gauges to check for gaps between couplings. Consistent spacing means better vibration isolation.
Adjust the position with jacking screws or shims. Shims made from steel or aluminum help you close gaps and keep the mount centered.
Make small adjustments with positioning screws. Lock these in place once you finish.
For heavy machinery, check that all anti-vibration supports touch the surface evenly. If you see a gap, add a shim to avoid a “soft foot” condition.
Tip: Start aligning from the top or most visible side. Use a mirror or tape to check hard-to-see spots. Never let metal parts touch directly—always use anti-vibration supports for full damping.
Mounting and Securing
Now you can mount and secure your anti-vibration solutions. This step locks in the damping and keeps your machinery safe from excess transmissibility.
Place the anti-vibration supports at the marked spots.
Insert bolts or studs through the holes. Add washers if needed.
Tighten the nuts with a torque wrench. Follow the manufacturer’s torque specs to avoid over-tightening.
Make sure there is no metal-to-metal contact. The rubber should be the only thing touching both surfaces.
For heavy machinery, check that the anti-vibration supports are not stretched or compressed too much. The right amount of squish gives you the best damping.
Mark the nuts with paint or use thread locker. This helps you spot any loosening during future checks.
Tip: Always use a torque wrench. Too much force can crush the rubber and lower the damping effect. Too little force can let the supports move, raising transmissibility.
Final Checks
You need to check your work before you run your machinery. These checks help you catch problems early and keep your anti-vibration solutions working well.
Look for oil, diesel, or other contaminants on the anti-vibration supports.
Inspect metal parts for corrosion.
Check the rubber for cracks or damage.
Measure the height of each support. A big drop in height means the support may have failed.
Make sure all bolts and nuts are tight and marked.
Gently load the machinery and watch for movement. The anti-vibration supports should hold steady and provide good damping.
If you see any signs of wear, misalignment, or damage, fix them before using the machinery.
Note: Regular checks keep your anti-vibration solutions working at their best. Replace any damaged supports right away to keep your machinery safe and quiet.
Common Mistakes
Sizing Errors
Sometimes, people pick the wrong size anti-vibration supports. This can cause problems with vibration control and damping.
If you use isolators that are too small, they can get squished too much. This means they are overloaded.
Rubber isolators can also get too much weight in one spot. This makes them not work right.
If isolators are not lined up, metal parts might touch. This lowers how well the damping works.
If you put hard metal parts next to isolators, you lose the good effects of anti-vibration solutions.
Clevis hangers that are too big may not hold the weight well. This causes bad damping.
Housed spring isolators can get stuck or fill with dirt. This hurts how well they work.
You should always match the isolator size to your machine’s weight and how it shakes. Doing this helps you get the best damping and keeps your anti-vibration supports working right.
Alignment Issues
Getting the alignment right is important for good damping. If you do not line up your supports, your machine can shake more and wear out faster.
Vibration mounts help keep machines steady and lined up.
Too much shaking can make things move out of place over time. This makes your machine work worse.
If things are not lined up, you will need more repairs. Parts will wear out faster.
You might hear loud noises or see damage to things nearby.
Bad alignment makes more vibration and makes your anti-vibration supports not last as long.
When shafts and gears are not lined up, you get more shaking and less damping. Always check the alignment to keep your machine safe and working well.
Over-Tightening
Some people think making bolts extra tight is better. But if you tighten anti-vibration supports too much, you can hurt your machine and lose damping.
Too much tightening squishes the rubber too hard.
You might see cuts, bumps, or broken rubber.
Machines often break early because of bad installation and over-tightening.
If you crush the rubber, it cannot soak up vibration. Your machine could break down.
Always use the right amount of force on bolts and nuts. This keeps your anti-vibration supports working and protects your machine.
Skipping Checks
If you skip checking your work at the end, your anti-vibration supports can fail early. Damping will not work well.
If you forget to tighten a bolt, your machine can shake a lot and move around.
Checking your machine often helps you find problems before they get worse.
Rubber isolators can wear out from oil, heat, or just getting old.
Loose bolts or worn rubber can make your machine shake, sag, or break other parts.
You should check engine mounts two times a year or every 500 hours.
Signs of trouble are clunking sounds, too much shaking, sagging, or cracks you can see.
Always do careful checks at the end. Tighten bolts the right way and look for damage. This keeps your anti-vibration supports and machines safe and working well for a long time.
Maintenance
Inspection
You should inspect your rubber mounts and isolators often to keep your equipment safe and working well. Regular checks help you spot problems before they get worse. Look for cracks, splits, or swelling in the rubber. These signs show that the damping effect may not work as it should. If you see oil or fluid leaks near the mounts, this can damage the rubber and lower the damping ability. Listen for clunking or banging noises when your machine runs. These sounds mean the mounts may not provide enough damping. If you feel more vibration in the steering wheel or floor, the mounts might not control movement well. Check for loose bolts or metal parts touching, as this can stop proper damping and cause more wear.
Regular inspection helps you catch wear or damage early. This keeps the damping strong and your equipment reliable.
Cleaning
Keeping your mounts clean helps them last longer and keeps the damping effect strong. Use mild cleaning agents and warm water to wash away dirt. Avoid harsh chemicals, solvents, or abrasives, as these can break down the rubber and lower damping. Use a soft cloth or brush to gently remove dust and debris. For tough stains, mix water and vinegar for a safe cleaning solution. Make sure you dry the mounts well after cleaning. Store rubber parts in a cool, dry place to keep their damping ability. Do not let oil, acids, or other chemicals touch the mounts, as these can cause swelling or cracks and reduce damping.
Use mild soap and warm water for regular cleaning.
Avoid strong chemicals that can harm the rubber.
Gently scrub with a soft brush to protect the damping surface.
Dry mounts fully before putting them back.
Replacement
You need to replace rubber mounts and isolators when they stop giving good damping. Watch for these signs:
More vibration in the steering wheel, floor, or machine body.
Clunking or banging noises during use.
Leaking fluid near the mounts.
Trouble shifting gears or moving parts smoothly.
If you notice any of these, the mounts may not provide enough damping. Replace them right away to keep your equipment safe. New mounts restore proper damping and help your machine run quietly and smoothly. Regular replacement keeps the damping effect strong and lowers repair costs. Always use the right type and size for the best damping.
Proper maintenance and timely replacement of mounts keep damping at its best, making your equipment last longer and work better.
You can control vibration well if you follow some steps. First, always wear safety gear to protect yourself. Next, check your equipment before you start. Pick the right pads for your machine. Put the pads on a clean surface. Make sure your machine is level and secure. Check if the damping is working right. Look at your equipment often to keep damping strong. If you install and take care of things the right way, damping will help stop wear. This also saves money and makes your equipment last longer. If you see bad damping, read the manufacturer’s guide or ask an expert. Good damping keeps people safe, helps machines work better, and saves money in many jobs.
FAQ
How often should you check rubber mounts and isolators?
You should check your mounts every six months or after 500 hours of use. Look for cracks, loose bolts, or signs of wear. Regular checks help you catch problems early and keep your equipment safe.
Can you reuse old rubber mounts when installing new equipment?
You should not reuse old mounts. Old rubber can lose strength and damping ability. Always use new mounts for the best vibration control and safety.
What should you do if you see oil or chemicals on your mounts?
Clean the mounts right away with mild soap and water. Oil and chemicals can damage rubber and lower its performance. If you see swelling or cracks, replace the mounts.
Do you need special tools to install rubber mounts?
You need basic tools like wrenches, a drill, and a torque wrench. These tools help you install mounts safely and correctly. Always follow the manufacturer’s instructions for best results.
How do you know if you picked the right size mount?
Check the weight and vibration level of your machine. The mount should support the load without squishing too much. If you see sagging or too much movement, you may need a different size.