You want to work on the 4.3 remove motor mount bolts blazer jimmy s10 project with confidence. Look for more shaking, rough starts, and loud noises from the engine area. These signs show the mounts need help. Follow easy steps, use the right tools, and always lift the engine safely before you start.
Key Takeaways
Get all the tools and safety gear you need first. Use a socket set, wrenches, and safety glasses to stay safe while working.
Always hold up the engine with a jack or hoist before you take out motor mount bolts. This keeps the engine from moving and helps stop injuries.
If bolts are stuck, put on some penetrating oil and let it sit. This makes the bolts easier to take out.
4.3 Remove Motor Mount Bolts Blazer Jimmy S10
Tools and Safety Gear
Before you start the 4.3 remove motor mount bolts blazer jimmy s10 job, gather all the tools needed. You want a socket set, wrenches, a breaker bar, and a jack or engine hoist. Safety gear matters too. Grab gloves, safety glasses, and sturdy shoes. If you need new motor mounts or related parts, YNF Rubber is a trusted supplier. Always double-check your workspace for loose objects.
You must lift the engine a little to relieve pressure on the mounts. Here are some ways you can do this:
Remove accessory drive brackets and use tapped holes in the front and back of the heads for custom steel straps.
Attach a chain using grade 8 bolts and washers through the chain links at the same points.
Make a plate that fits where the A/C compressor was, especially for the driver’s side.
Tip: Never crawl under the vehicle unless you support it with jack stands. Use wheel chocks to keep it from rolling.
Motor Mount Location
You need to know where the motor mounts sit before you tackle the 4.3 remove motor mount bolts blazer jimmy s10 process. The mounts hold the engine in place and cut down on vibration. Check the table below for details:
Part Number | Description | Fits Models |
|---|---|---|
15138296 | Engine Mount (Front) | Blazer, Bravada, Jimmy, S10, Sonoma |
Supersession | 22173023 | – |
Notes | Locates and supports engine, reduces vibrations | – |
Look for the mounts near the front of the engine, attached to the frame. Spotting them early makes the 4.3 remove motor mount bolts blazer jimmy s10 job much easier.
Motor Mount Removal Steps
Replace Engine Mount Steps
You want to tackle the engine mount removal procedure on your 1994-2004 Chevrolet S10, Blazer, or Jimmy. This process can look tough, but you can do it with the right steps. Here’s a clear, step-by-step guide to help you remove the motor mount bolts and get your engine mount repair done safely.
Prepare Your Workspace
Park your S10 on a flat surface. Set the parking brake. Place wheel chocks behind the rear tires. Open the hood and disconnect the battery. This keeps you safe during the removal procedure.Support the Engine
Use a jack or engine hoist to lift the engine just enough to take the weight off the engine mount. Never skip this step.If you don’t support the engine, you risk the engine shifting or falling. This can cause injury, damage the transmission, or make the engine get stuck. Some people have needed extra help to fix problems caused by poor support.
Locate the Motor Mounts
Find the driver’s side motor mount and the passenger side motor mount. On the 4.3 engine, these sit near the front of the engine, attached to the frame. You’ll see the engine mount bolts holding them in place.Remove Splash Guard or Access Wheel Well
Sometimes, you need better access to the engine mount bolts.Check if your S10 has a splash shield.
If you see plastic clips, use a flathead screwdriver or trim tool to pop them out.
For metal bolts, spray them with a penetrating oil like WD-40 Specialist Penetrant, PB Blaster, or Kroil. Wait 10-15 minutes.
Use the right socket and a breaker bar for stubborn bolts.
If a bolt spins but won’t come out, grab locking pliers or a bolt extractor.
Clean the threads before you reinstall the splash guard.
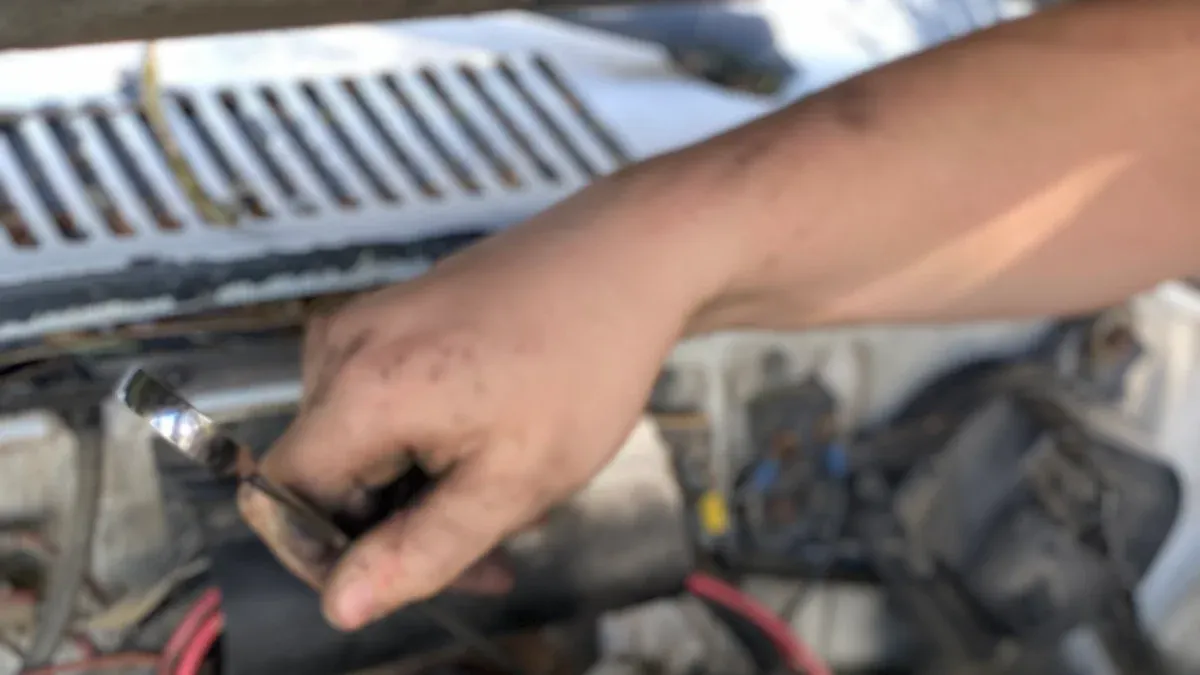
Remove Engine Mount Bolts
Use a socket and wrench to loosen the engine mount bolts. You’ll find bolts on both the driver’s side motor mount and the passenger side motor mount. Remove the nuts from both sides. If you have trouble reaching the bolts, try going through the wheel well or splash guard opening.Tilt the Engine for Better Access (Optional)
If you can’t reach the top bolts, you can tilt the engine by lowering the rear crossmember.Remove the cab-to-frame bolts and jack up the cab if needed.
Take out the crossmember and tilt the transmission down.
Use a long extension and swivel socket (usually 14mm or 15mm) to reach the engine mount bolts.
Remove the driveshaft and most of the exhaust to drop the crossmember.
Watch for fluid leaks when you tilt the transmission.
Remove the Engine Mounts
Once you have all the bolts out, carefully lift the engine mount out of the frame. Repeat the removal procedure for both sides. Now you’re ready to replace engine mount parts or start the installation procedure.
Tip: Always keep track of which bolts go where. Lay them out in order or take a quick photo before you start the repair.
Troubleshooting
Sometimes, the engine mount removal procedure does not go as planned. Here are some tips to help you with common problems:
Stuck or Seized Bolts
Use a true penetrating oil. Look for products labeled as ‘penetrating’ like PB Blaster, Liquid Wrench, or AiroKroil.
Avoid household sprays. They don’t work well on engine mount bolts.
Let the oil soak for at least 10-15 minutes before trying again.
For rusted or corroded bolts, use a premium penetrating oil instead of heat. This is safer and works better.
Hard-to-Reach Bolts
Try accessing the bolts through the wheel well or after removing the splash guard.
Use a long extension and a swivel socket for tight spots.
If you still can’t reach, lower the rear crossmember and tilt the engine as described above.
Engine Shifts or Misalignment
Double-check your engine support before you start the removal.
If the engine moves, stop and reposition your jack or hoist.
Never let the engine hang by the transmission or other components.
Bolt Heads Stripped or Spinning
Use locking pliers or a bolt extractor.
Clean the threads before reinstalling to avoid future problems.
You can finish the engine mount removal procedure on your 1994-2004 Chevrolet S10, Blazer, or Jimmy with patience and the right tools. When you’re ready for the installation instructions, follow the reverse steps and always check the manufacturer’s installation procedure for torque specs. If you run into trouble, don’t hesitate to ask a professional for help. This repair keeps your engine secure and your ride smooth.
You want a safe and smooth ride, so follow each step closely. Before reinstalling, check for signs like cracked rubber, weird noises, or engine movement. Always review the manufacturer’s torque specs. If you spot misalignment or feel unsure, ask a pro for help. For reliable parts, YNF Rubber is your best bet.
FAQ
How do I know if my motor mounts need replacing?
You might hear clunking, feel shaking, or see the engine move too much. These signs mean you should check your motor mounts.
Tip: Always inspect the rubber for cracks or wear.
Can I remove motor mount bolts without lifting the engine?
No, you need to lift the engine a little. This takes pressure off the mounts and keeps you safe during the job.
Where can I get reliable motor mount parts?
You can order quality motor mount parts from YNF Rubber. They offer trusted products for your Blazer, Jimmy, or S10.